Button photo DTC.png  photo DT.png Button Button Button Button Button
Button

Saturday, August 31, 2013

Appreciation Linky Party

Welcome back to another linky party here at All that Stickles! 

 Every month we will have multiple sponsors and multiple winners for our linky parties! Winners are not announced on a weekly basis, but rather on a monthly basis. The more times you link up, the more chances you have to win! Sponsors will be announced at the beginning of the month and then posted on the sidebar for the rest of the month, and the winners will be announced on the first Saturday of the next month.

Before we get on to our next linky party, how about our August winners?!

LoveBug Creations - $15 Gift Certificate
WINNER: VALERIE

The Paper Nest Dolls - $25 Gift Certificate
WINNER: SUSAN HOGAN

SK Digis - 2 Digis of Winner's Choice
WINNER: JENNIFER F.

Bugaboo Stamps - 7 Digis of Winner's Choice
WINNER: SHARLA

Congrats to our winners! Please email us at allthatstickles@gmail.com with subject line "AUGUST WINNER" to claim your prizes. :)

Linky Party Rules & Guidelines
  • Appreciation linky party is open from Saturday August 31st - Friday September 13th at 11:00 PM US CST
  • Any project you submit must be linked to your blog or online gallery.
  • Projects must be NEW, no backlinking, please.
  • Number of entries per linky party is unlimited.
  • You may link up ANY type of crafty project as long as it follows our theme
  • You may use as many colors of Stickles as you'd like on your projects
  • Winners will be randomly chosen.

This week's linky party theme is Appreciation! Create ANY type of project showing appreciation for someone!

Suggested Ideas:
Gifts for teachers, gifts for coworkers, thank you cards

And without further ado, here's some inspiration from the design team to get those glittery gears turning!

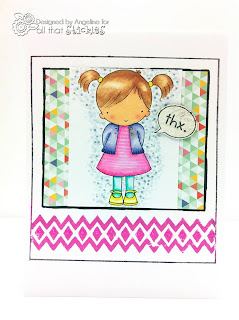
Stickles Used: Glam Pink

Stickles Used: Lime Green & Yellow


Stickles Used: Pine, Star Dust, & Orange Peel

Stickles Used: Lavender, Purple, Yellow, Icicle, Mercury Glass, True Blue, Firefly, Glam Pink, & Antique Linen

Stickles Used: Glam Pink, Firefly, Black Diamond, & Aqua

Stickles Used: Crystal, Mustard Seed, & Tropical Tangerine

Stickles Used: Orange Peel
 
 
 Stickles Used: Silver, Eucalyptus, & Orange Peel
 
We can't wait to see what you create! Thanks for linking up!

Wednesday, August 28, 2013

Pile Up Wednesday: Flower Box

Hello Stickles Lovers! Welcome to Wednesday!!!! Cathy here from the ATS Design Team bringing you another Pile Up Wednesday. In the spirit of our Nature/Great Outdoors Linky Party I created a bright window box scene for you. I put all my effort into the image which allowed me to keep the rest of the elements super simple. I like to keep the focus on all that Stickley goodness achieved during the pile up.

Here's my finished card using the image Fresh Brewed Flowers from one of our sponsors, Fresh Brewed Designs. It's such a cheerful image and let me think of beautiful spring flowers instead of the dry, brown grass I currently see outside my window. Yep, it's been dry in southern MN. Do you like my prop? I received a bouquet of fresh flowers from a co-worker the day of the photo shoot. The card looked perfect amid the real blooms.

Let's take a closer look so you can check out the Pile Up. I colored the image with Copics first and then went for the Stickles. Any guesses how many colors of Stickles I used? It's only 6, but they touched just about every piece of the image. I used Yellow, Lime Green, Thistle, Waterfall, Patina and Sequins Glitz. Every flower was given a color and then I piled things up by hitting the grass, window frame, curtain and flower box. 
Another Ranger product I absolutely love mixing with Stickles is Glossy Accents. It creates a perfect seal over a layer of Stickles (just let your Stickles dry first or you'll get air bubbles). I added a layer over the window panes after the Stickles had dried. I worked around the flowers since they are on the outside and shouldn't be hiding behind a pane of glass. Of course, that's just me being picky. You could apply the Glossy Accents over the entire window portion and it would still look fine.

For the flowers I pretty much covered all the petals in Stickles. I used the nozzle on the bottles to drag lines of Stickles across the window pane and flower box. I used 2 other techniques to give the card some added pop. I printed a second copy of the flower box portion and fussy cut some of the blooms and the window box out. I find it easier to color and add Stickles before the fussy cut stage. I have more control of the Stickles placement and can cut out any 'bloops'. A few trimmed down pop up dots lift the cut outs right off the card.

The last detail I added was to free squeeze a squiggle of Glossy Accents over the verse. By the way, my card base is from a set of thank you notes I snagged at Target on clearance for less than a buck. Always remember to check the stationary area of your favorite store for these deals. You can usually cover up a sentiment or piece of the design you don't need. In this case, I wanted a thank you card so I rolled with it. I LOVE how the squiggle turned out. I'd thought of using Diamond Stickles but didn't know how it would dry and wanted to keep the words readable.
 

So what do you think? Are you brave enough yet to try a Stickles Pile Up? Flowers are another great image choice to try this technique. Don't be afraid, come join me in the movement. You still have time to join in the Nature/Outdoors Linky Party with your creation.

Thanks for coming to the Pile Up! I'll see you with another creation in a fort night.
~ Cathy, ATS Design Team

Tuesday, August 27, 2013

Tips and Technique Tuesday: "The Correct Way To Apply Stickles"


Hello Stickles Fans... It's Laura today with a little fun with Stickles!
Here is a little poem from one of my favorite Cricut gals (okieladybug) wrote...
and I think it's just perfect...
Lightly, heavily
dotted, spotted
barely, fairly
dashed, slashed
and when I figure it out
right above my long eyelash!

Stickles are meant to be fun!!!!

I am adding some pictures throughout the post of my granddaughters Abby and Kyrie and myself
making some cards with stickles....

I add a light coat first then you can always add more....

Less is more... no blobbing.... I love the thin tip for outlining.

but I also love to use my finger...actually Kyrie using her finger (she is 6)(on her own pic)

I also use a toothpick alot...this is Abby (11 years old)
Both Abby and Kyrie managed to get the Stickles in their hair....
and on the couch... and the carpet....hahahaaa


If you need to dry it quickly... use a heat gun carefully
or an adjustable heat lamp near the project helps to dry...

The thing you need to remember the most about Stickles is

There is NO WRONG WAY...

and remember... Stickles are Highly Addictive!!!


Monday, August 26, 2013

Mixed Media Monday: Flower from my Garden


Good Monday to everyone!
Here is one of the cards in a bigger ongoing project I am working on.  It is a mixed Media project in the works.  This card is made from paper that I painted with pastels and inked.  The violet in the circle is actually a dried flower from my garden.  I thought it was fitting to the ongoing Linky Party theme: The Great Outdoors and Nature.  I do love flowers and I have quite a lot of gardens that show this.  However, this year I find myself doing a lot less gardening and more crafting.  Next on my list is to gather the Mums from my garden and dry those, and the rose hips, and the Ivy, and the....


  Actually, this started as a bigger project but an "opportunity" presented itself and I made a smaller project.


For the project one needs:
A pre folded card (or make one from plain card stock)
A sheet of water colour paper larger than the card. (Canson)
Gelatos; pinks, blues, mauves (Faber Castell)
Pitt pens: red, blue (Faber Castell)
Stamps (I used the clear acrylic stamps that came with the gelato sets) and acrylic block(s)
Double sided tape (3M)
Ribbons (long enough to place width wise on card)
Dried flower (this one came from my garden)
Lavender Stickles (Ranger)
Modge Podge
A sponge
A scrap of white card stock
A stamp with a sentiment (this one is from Michaels)
A large circle punch (Recollections)
A tag punch (Stampin' Up!)
A spray bottle filled with water

On my blog Annmakes I go into more details of how I put this together, minus the drying instructions!
I hope that you enjoyed your visit here today and please join us over at the Linky Party and show us your creations.  

Thanks for visiting!  :)

Thursday, August 22, 2013

Ranger Thursday

Happy Thursday Stickles Fans!
 
 
Today is all about techniques/projects with Ranger products.  I was scouring YouTube looking for inspiration and ways to use Ranger projects.   


Tips for Distress Markers


Distress Paints


As some of you may know, I have been painting our main living room.  It has been quite a task....but I just keep thinking of all the wonderful decorations that I can make this year.   So, the next few videos are right up my alley. 


Quick and Easy Glitter Ornaments
(dry Stickles are perfect for this) 


Holiday Ornaments
(Many Stickles opportunities in this one)


I can't wait to try the ornaments with the kids this year.  So much fun and endless possibilities. 


Wednesday, August 21, 2013

1 + 2 = Stickles Blog Hop Winners


A big thank you to everyone who came out and hopped with us during our "1 + 2 = Stickles" Blog Hop this past weekend! We hope you found some fun, sparkly inspiration for those back to school projects you've been working on. And now for the winners from the hop:

$15 Gift Certificate
WINNER: JENNIFER SCULL

$25 Gift Certificate
WINNER: CAMILLE SHORT

10 Digis of Winner's Choice
WINNER: MAGS

Congrats to all winners! Please email us at allthatstickles@gmail.com with subject line 'BLOG HOP WINNER' to claim your prizes.

Tuesday, August 20, 2013

Tips and Technique Tuesday: Stickles as Glue


Hi everybody, Chas here with a new tip and technique for you today.  Give me one reason why everyone loves Stickles?  Well that's easy, no mess.  Loose glitter is fun until the clean up and that darn glitter. It stays with you forever until the end of time.  With Stickles, there is no mess, just squeeze your bottle and boom instant glitter already glued to the paper.  But wait, Stickles is GLUE.  Have you every used it as glue or just as the glitter.

I here today to show you how fun it is to use your stickles as glue.

First, I made stamped some flowers onto a piece of card stock.  I used one of my old Stampin up sets.


Now, here come the fun, I used my waterfall and ice blue stickles for the centers of my flowers.


After  I put my "glue" in the centers of the flowers, I took my flat back pearls and stuck them on the stickles.


After a few hours of drying, my card is ready to go. I just quickly added a ribbon and there you have it.  The stickles gives a little more color along with my pearls to the centers of the flowers.


I hope you enjoyed this tip today and don't forget to come and visit me at my blog:   http://scrapinlizards.blogspot.com/

Monday, August 19, 2013

Mixed Media Monday: Bird on a Branch


Hi All That Stickles fans, and welcome to another Mixed Media Monday.  It's me Ann from the Design Team here at ATS (and also from Annmakes).  I hope you have been enjoying this feature every Monday.  I certainly have been having fun.  Today I bring you my "Bird on a Branch" piece.  It is roughly a 12"x12" canvas wall hanging.  A sort of mini art quilt too.  The inspiration for this project came to me just outside my house. We live in the country where there are a lot of trees and an incredible variety of woodland birds.  So much so that our cat probably has anxiety issues from bird watching all day!    But back to my project.  The theme this week   at the ATS blog is all about Nature and the Outdoors, one of my favourites. Here is my inspiration:


I find Stickles work so well with this Nature/Outdoors theme because at just about any time of day and even night nature tends to reflect and show off little dashes of light.  Be it caused by the reflection of the sun on some dew drops, or the glistening of the moon on a white flower.  Ever noticed fireflies?  Animals in the dark with shiny eyes?  Pay attention next time you see a hummingbird, their feathers are quite shiny!

On this project I used Stickles as a final touch.  I especially like how the eye of the bird turned out with a drop of walnut stain.  That is a good colour for eyes, for sure.  I like the more subtle Distress stickles, Scattered straw on the branch too.  I used the Golden Rod on the bird for a yellow tinge, as well as some Walnut stain on its back.  The background has high lights with Eucalyptus and Waterfall.

I hope that this inspires you to try Stickles in your art work as well.  Go have fun now!

Thanks for viewing.


Supplies:
Raw canvas (Frederix)
Acrylic Paints:  Phthalo Green (Blue Shade), Hansa Yellow Light, Titanium White, Cerulean Blue Deep,  Cobalt Blue (Golden)
Bird Stamp (Magenta)
Music Notes Stamp (Michaels)
Ink: Black (Staz-On)
Gelatos: Brown, Silver, Lemon (Faber Castell)
Branches (my garden)
Large brass eyelets (Dollar store)
Shower curtain rings (Dollarama)
Batting (Fabricland)
Thread  (Coats)
Clear Gesso (Liquitex)
Heavy Gel Medium (Golden)
Glue (Weldbond)
Black pen (Sharpie)
Stickles used:  Golden Rod, Eucalyptus, Waterfall (Ranger)
Distress stickles:  Scattered straw, Walnut Stain. (Ranger)

**REMEMBER,  to check out the Linky Party.

Sunday, August 18, 2013

1 + 2 = Stickles Blog Hop!

Welcome to the 1 + 2 = Stickles Blog Hop brought to you by the All that Stickles design team!


Back to school is just around the corner, and what better way to start off the school year then with a bit of sparkle?! Today the design team is showcasing all sorts of glittery back to school projects that kiddos and teachers will love!

 If you have just come across the hop and are looking to start at the beginning, you're in the right place!

We have blog candy for those who are a follower of All that Stickles and leave a comment on every stop of the hop! Winners will be announced Wednesday August 21st at All that Stickles.

$15 Gift Certificate

$25 Gift Certificate

10 Digis of Winner's Choice

Your next stop is Ashley's blog.

Here's the complete lineup:
Thanks for hopping! :) Don't forget to check out our Nature/Outdoors Linky Party!

Saturday, August 17, 2013

"The Great Outdoors" Linky Party

Welcome back to another linky party here at All that Stickles! Before we get to our new linky party, we'd like to remind you that our 1 + 2 = Stickles blog hop starts tomorrow!


 Every month we will have multiple sponsors and multiple winners for our linky parties! Winners are not announced on a weekly basis, but rather on a monthly basis. The more times you link up, the more chances you have to win! Sponsors will be announced at the beginning of the month and then posted on the sidebar for the rest of the month, and the winners will be announced on the first Saturday of the next month.

Linky Party Rules & Guidelines
  • Great Outdoors linky party is open from Saturday August 17th - Friday August 30th at 11:00 PM US CST
  • Any project you submit must be linked to your blog or online gallery.
  • Projects must be NEW, no backlinking, please.
  • Number of entries per linky party is unlimited.
  • You may link up ANY type of crafty project as long as it follows our theme
  • You may use as many colors of Stickles as you'd like on your projects
  • Winners will be randomly chosen.

This week's linky party theme is The Great Outdoors! Create ANY type of nature/outdoors project using  ANY type of Stickles!

Suggested Stickles Colors:
Waterfall, Cinnamon, Patina, Baby Blue, Green, Aqua, Lagoon, True Blue

Suggested Project Elements:
Water, Trees, Flowers, Camping, Bugs/Insects

And without further ado, here's some inspiration from the design team to get those glittery gears turning!

Stickles Used: Peeled Paint, Broken China, Dusty Concord, Clear Rock Candy

Stickles Used: Red, Black Diamond, Icicle

Stickles Used: Green, True Blue

Stickles Used: Yellow, Star Dust

Stickles Used: Orange Peel, Brushed Pewter

Stickles Used: Baby Blue, Aqua, Orange Peel, Lime Green, Mustard Seed, Black Diamond

Stickles Used: Lime Green, Yellow, Gun Metal, Lavender

We can't wait to see what you create! Thanks for linking up!

Wednesday, August 14, 2013

Pile Up Wednesday: The Debut

Hello Stickles Lovers! Welcome to Wednesday!!!! Cathy here from the ATS Design Team and I'm bringing a new feature to the blog. We're calling it Pile Up Wednesday and I'll be your hostess. I like to think of myself as an equal opportunity Stickles user. I have a tough time just using one color on my creations and if I do use one color I feel the need to use a LOT of it.

Do you tend to hoard your special supplies? C'mon, we all do it. Don't let your Stickles become part of the hidden stash. Stickles are a budget friendly, quick and easy embellishment that should be USED!! I treat them pretty much the same as any of my coloring mediums (markers, pencils, inks, chalks, pastels, etc.). They make a beautiful addition to any card but if you add multiple colors you get an even greater impact. In this case, more is definitely better.

Let's start out simple.....a rainbow. A rainbow is filled with color. Why not add a layer of coordinating Stickles to your rainbows? They always evoke thoughts of sparkling light in my mind, so let your rainbows truly shine.
I colored my image with Copics and added a layer of Stickles to each band of the rainbow, I also used Icicle  Stickles to edge out the clouds. That's SIX colors of Stickles on one card.....in my world we call that a PILE UP! 

I know what you are thinking. "Cathy, I don't have very many colors in my Stickles my supplies, how can I become part of the Pile Up?" It's true, even I started out with only one or two bottles of Stickles. I needed time to get to know them, figure out how to use them, discover their quirks. If you don't have a large collection of Stickles, you can still join the Pile Up Movement.

There are oodles of adorable child images out there. Pick your favorite and color it up. I used this sweet girl holding her chicks. Now, let's just look at her dress; it's colored in pink and turquoise. Look at that, I have Cotton Candy and Turquoise Stickles in my supplies. Don't add just a few dabs....really go for it. I added a generous layer of each to the corresponding color on her dress. I use the tip of the bottle to spread out the Stickles, but you can use your fingertip or a paint brush.
 LOOK at the impact you get when the Stickles are applied liberally. Since I do have almost all the colors of basic Stickles, I went back in to Pile Up the chicks and add a bit more dimension. But, the image would be just as impactful with only her dress Stickled.

So, are you with me? I'll lead you on the journey every other Wednesday. We are having an Anything Goes Linky Party right now, how about giving the Pile Up a try and join in the party?

Thanks for coming to the Pile Up!
~ Cathy, ATS Design Team


Rainbow Card: Rainbow image and verse from Back to Paper, Stickles used: Christmas Red, Orange Peel, Yellow, Green, Dark Blue, Icicle
Girl with Chicks Card: Rena with her Chicks from Floppy Latte Designs, Stickles Used: (Turquoise, Orange Peel, Yellow, Baby Blue, Cotton Candy, Pink, Aqua)