This is Cynthia .
Today I will be showing you a technique on how to add Stickles to some chipboard pieces
and use them to make some
Project Life tags.
First off you start with your choice of pieces to Stickle.
For this project I used some
American Crafts printed chipboard images,
which are shown below.
which are shown below.
The Stickles that I used for this project were
X-mas Red, Cotton Candy, Icicle and Crystal.
Once my colors were chosen I went ahead and started the technique.
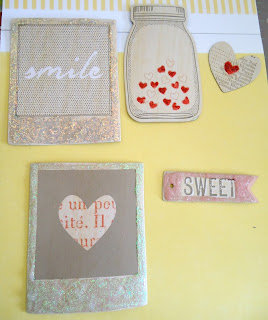
I applied the Stickles where I wanted so it could make the chipboard stand out a lot more.
This is how that turned out.
What a big Difference Stickles make right? :)
Once that is done all you have to do and wait for it to dry.
Remember it will be quite a while for it to dry just be patient.
While that is drying I picked my
tags from my Clementine Core Kit.
These are the tags I will be using and will be adding my chipboard Stickled pieces to .
These are the finished Project Life Tags :)
Thank you for stopping by to check out my technique!
- Cynthia
Don't forget you still have plenty of time to get your crafty things posted for our Lime Green Linky party :)


Thanks for another great tip. Love the way the stickles enhances the chipboard.
ReplyDeleteThis comment has been removed by the author.
ReplyDeleteGreat tip, I never thought of using stickles with PL tags! :)
ReplyDelete