Button photo DTC.png  photo DT.png Button Button Button Button Button
Button

Thursday, February 28, 2013

Stickles: Where & How to Buy


Button 
Do you want to have the entire Stickles collection, but you don't know where to buy them?  We have a few tips for you.

(Hobby Lobby Stickles Display)
  
Stickles are carried by many places, online and brick-and-mortar facilities.  But most do not carry the entire line of Stickles.  I have found that ordering from a few places gave me the best option. 

Starting at one, or a few of, the three big craft stores (Hobbly Lobby, Joann's, & Michael's) can be a great starting place.  Each store only carries a portion of collection, if any, in the store.  But you can get them fairly cheap if you choose to purchase from any of the three stores.  Just use a coupon to purchase pack of Stickles each time you visit the craft store. 

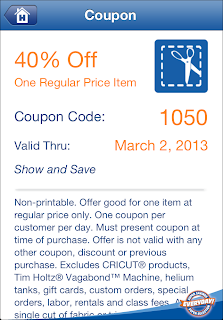
Hobby Lobby has a weekly 40% off coupon you can either print from their website, obtain from a flyer or your local newspaper, or a smartphone application. 


(hobbylobby.com)

(Hobby Lobby app)

Michael's coupons can be obtained from any of the same sources as Hobby Lobby.  Keep in mind that Michael's coupons vary.  So you must pay attention.  The coupons, such as the ones pictured below, can be for a percentage off one non-sale item or a percentage off your total purchase including sale items. 

(Michaels.com)

(Michael's app)


Joann coupons can also be obtained from their website or on a smartphone app.  Notice that the smartphone app shows future coupons.  I personally like that.  Since I have kids, I can make plans around hitting the craft store during the coupon usage time period.  Joann.com routinely has their Stickles on sale.  If you're like me, you wait for the sale to hit; and order enough to get free shipping. :) Win-Win.   Stickles on sale, no time lost at the store, and no gas used to get there. 
(Joann.com)


(Joan app)

  Just use a coupon to purchase pack of Stickles each time you visit the craft store.   

There are several online stores that carry Stickles.   A few that come to mind are:
Be sure that you take shipping into accout when choosing where and when to purchase your Stickles.

Manuvering through the vast options of places to purchase Stickles can be overwhelming.  Hopefully we have given you some tips that will help you along your journey. 

Tuesday, February 26, 2013

Tips & Techniques Tuesday: Making a Color Chart


Hello, fellow Stickles-lovers! :) Welcome to our tip/technique/tutorial Tuesday!

It's Melanie today and I'm going to show you a good way to make a Stickles color chart.  First, print off the one provided by Ranger Ink site. 


  If you can;t get them to open, print out multiples of the one that works.  Then label WHAT type of Stickles they are going to be.  If it's not the original set, you may want to white-out some of the existing names.


Next, write in the names of the color set for the chart you are making.


Apply the Stickles to the chart.  This is a good time to test new bottles.


When you are done, you will have a chart of all the Stickles colors you own and those you don't yet.  


This is a really good tool to decide which colors coordinate best for your project.  It also shows the color when it's dry, which is sometimes different than how it looks in the bottle.
 
 
*Note - Ranger has charts for all types of Stickles (Regular, Ditress, & Ice).  But it may difficult to open the file or you may receive an error message when trying to do.  If you would like a copy, please send us a message at allthatstickles@gmail.com

Saturday, February 23, 2013

Star Dust Linky Party

Welcome this week's linky party att All that Stickles!  One thing that you want to be sure not to miss is our Design Teams techniques/tutorials every Tuesday and Thursday. If you missed Cathy and Cynthia's posts this week, you can find them HERE.

Now it's time for our linky party!
Every Saturday will mark the beginning of a new weekly linky party at All that Stickles . Each week we will designate a color of regular Stickles (usually not Distress Stickles, or Ice Stickles, but every once in a while we may throw those in there) and invite you to share projects you've made using that particular color of Stickles!

And don't forget about the prizes! Every month we will have multiple sponsors and multiple winners! Winners are not announced on a weekly basis, but rather on a monthly basis. The more times you link up, the more chances you have to win! Sponsors will be announced at the beginning of the month and then posted on the sidebar for the rest of the month, and the winners will be announced on the first Saturday of the next month. So February winners will be announced on Saturday March 2nd.

Linky Party Rules & Guidelines
  • Linky Parties are open from Saturday at 12:00 AM US CST - Friday at 11:00 PM US CST.
  • Any project you submit must be linked to your blog or online gallery.
  • Projects must be NEW, no backlinking, please.
  • Number of entries per linky party is unlimited.
  • You may link up ANY type of crafty project as long as it uses the Stickles color of the week.
  • Projects not using the Stickles color of the week will be disqualified.
  • You may use as many colors of Stickles as you'd like on your projects as long as the color of the week is included.
  • Winners will be randomly chosen.

This week's linky party theme is Star Dust!

Create ANY project using Star Dust
Stickles!


And without further ado, here's some inspiration from the design team to get those glittery gears turning!

Stickles Used: Star Dust
Image from Bugaboo Stamps


Stickles Used: Star Dust
SK Digi


Stickles Used: Star Dust

Stickles Used: Star Dust


Stickles Used: Star Dust

Stickles Used: Star Dust
Love Blocks - Day After Forever image from Bugaboo Stamps


 Stickles Used: Star Dust, Fruit Punch

We can't wait to see what you create! Thanks for linking up!

Thursday, February 21, 2013

Technique Thursday Blasted Stickles

Hello to all Stickles lovers this is Cynthia
 here to show you the technique for today :)
This technique is pretty cool 
it's my first time doing it and 
it was a success. 
So I hope you try it to give 
your cards a stickled background. :)

First you gather your supplies : Stickles, an air can, and your desired piece of cardstock . :)


Then you add some dots of stickles of all the colors 
you want in every way or pattern you would like as shown below. 
I just added them randomly with the yellow ones; and then I did the same with all the rest.


And once they are all down, you add some of the air in the can and spray them about two inches from the can.  Then you will get a result like the one below, hence the name blasted stickles :)
 Your colors will start to mix and that's what you want so it can get that cool color mix effect. Then you just let them sit over night so they all dry. 
Then you are able to trim you paper to the size you want .

 Then you add it to your card base
 as a background.
 This is how that looks in the picture below .

And the last step is to create your card :) 
And this is how it turned out. 


Thank you for stopping by todays technique and don't forget to link up your project for our fruit punch stickles color of the week you still have time. 
- Cynthia 

Wednesday, February 20, 2013

Think Spring Blog Hop Winners!

Thanks much to everyone who hopped with us this weekend! For more Stickles fun make sure to check out this week's Fruit Punch Linky Party and also our fabulous Tuesday tutorial from DT member Cathy about how to add dimension to Stickled images! 

And now for the winners of our blog hop prizes!

$6 gift certificate
WINNER: PAM

1 Stamp set of Winner's Choice
WINNER: MARIANNE

10 Images of Winner's Choice
WINNER: HATTIE

Winner's Choice of Cricut or Cameo Cover
WINNER: ROBIN


Congratulations, ladies! 
Please email us at allthatstickles@gmail.com to claim your prizes. :)

Thanks again to everyone who hopped with us! We hope you join us again for our Rainbow Blog Hop on Sunday March 17th! 


Tuesday, February 19, 2013

Tips & Techniques Tuesday: Adding Dimension to Images


Hello, fellow Stickles-lovers! :) Welcome to our tip/technique/tutorial Tuesday!
Cathy here, ready to show you an easy way to add depth and dimension to your colored images using Stickles.

For my example I'm using this adorable digital image from Fresh Brewed Designs.

 I colored the image with Copics. You can use  whatever coloring medium you prefer.


I used Xmas Red, Fruit Punch, Cotton Candy and Lime Green Stickles.

I squeeze a small line of Stickles along the darkest area of my image (where I would show the shadows).

 Don't squeeze any more out, the trick is to lay down a thin layer of Stickles in the shadowed parts. Using the tip of the container, spread the Stickles out. It's almost like the 'flicking' motion used when coloring so you get a lighter fade at the end.

 Here's my heart with all the Xmas Red Stickles added in.

I did the same process with the Lime Green Stickles on the leaves.

 Since the leaves aren't as large as the heart, you don't have as much area to work with. I tried to leave some of the highlights sections Stickles free.

The hearts inside the vase and stem are really too small to Stickle in dimension, but they are still perfect for adding sparkle. I used Fruit Punch and Cotton Candy on the hearts and bow.

 Here's the image once the Stickles have been applied.

To bring in some added dimension, I pull in my Glossy Accents. I like to use this whenever I have a 'glass' type image. I put a thin layer over the vase and also on the heart flower. The trick to using Glossy Accents over Stickles is to make sure the Stickles are dry. When I've added GA before the Stickles was dry, I sometimes get a weird 'pitting' in the final image.

Here's the image with the Glossy Accents added on.

 Here are two shots of the final image once everything is dry. The Stickles add just a touch of sparkle to the shadowed areas of the image and help make the lighter areas pop.

Here are a few examples I've created with more detailed images. I think you can get a better idea of how this technique works.
 Clown image by Rick St. Dennis

 Both girl images are from Kenny K.

 
Thanks for stopping by; I hope you found this technique useful and inspires you to use your Stickles in a new way.
Don't forget to play along in this week's Linky Party with your Fruit Punch creations.

Cathy